Authentication

Create an access token

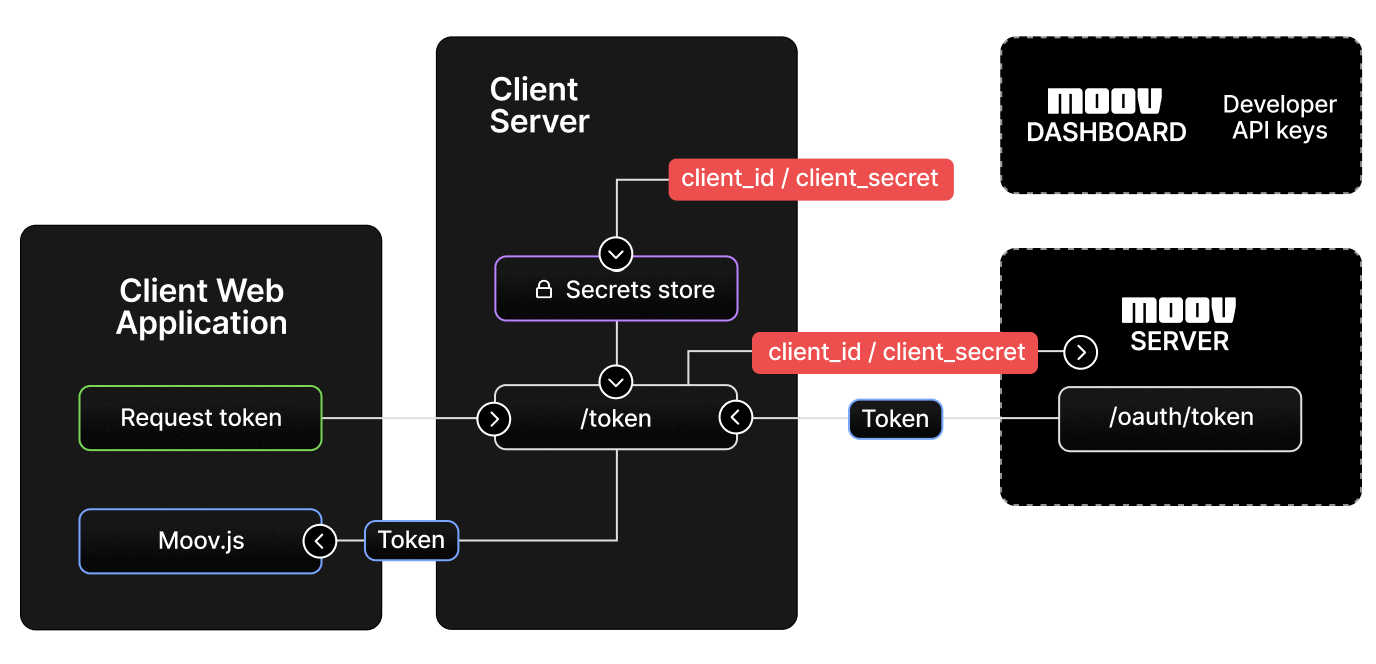
Within your server-side application, you’ll generate a single-use access token that contains information needed to securely communicate with your Moov account. Once you’ve generated this token, you can use it to make calls from the server or send it back to your client to use with Moov.js.

Diagram showing token generation process

 1
 2
 3
 4
 5
 6
 7
 8
 9
10
11
12
13
14
15
16
import { Moov, SCOPES } from '@moovio/node';

const moov = new Moov({
  accountID: "YOUR_MOOV_ACCOUNT_ID",
  publicKey: "PUBLIC_KEY",
  secretKey: "PRIVATE_KEY",
  domain: "YOUR_DOMAIN"
});

const scopes = [SCOPES.ACCOUNTS_CREATE];
try {
  const {token} = await moov.generateToken(scopes);
  // Do something with token
} catch(err) {
  // Handle any errors
}
1
2
3
4
5
curl -X POST "https://api.moov.io/oauth2/token" \
  -u "client_id:client_secret" \
  -H "Content-Type: application/x-www-form-urlencoded" \
  --data-urlencode "grant_type=client_credentials" \
  --data-urlencode  "scope=/accounts.write" \

Initialize Moov.js

Once you have the access token you can initialize moov.js in the browser by including the script and initializing Moov.

1
2
3
4
<script type="text/javascript" src="https://js.moov.io/v1"></script>
<script>
  const moov = Moov(token)
</script>