Accept cards with Apple Pay
Moov allows you to accept card payments with Apple Pay. This guide covers how you can start accepting Apple Pay on the web using the open standard Payment Request API.
Prerequisite
Before getting started, please check that your website follows Apple' guidelines and that your server is set up accordingly.
- Apple Pay website guidelines
- Apple Pay server Requirements
- All pages that include Apple Pay must be served over HTTPS
- Your domain must have a valid SSL certificate
- Your server must support the Transport Layer Security (TLS) protocol version 1.2 or later, and one of the cipher suites listed
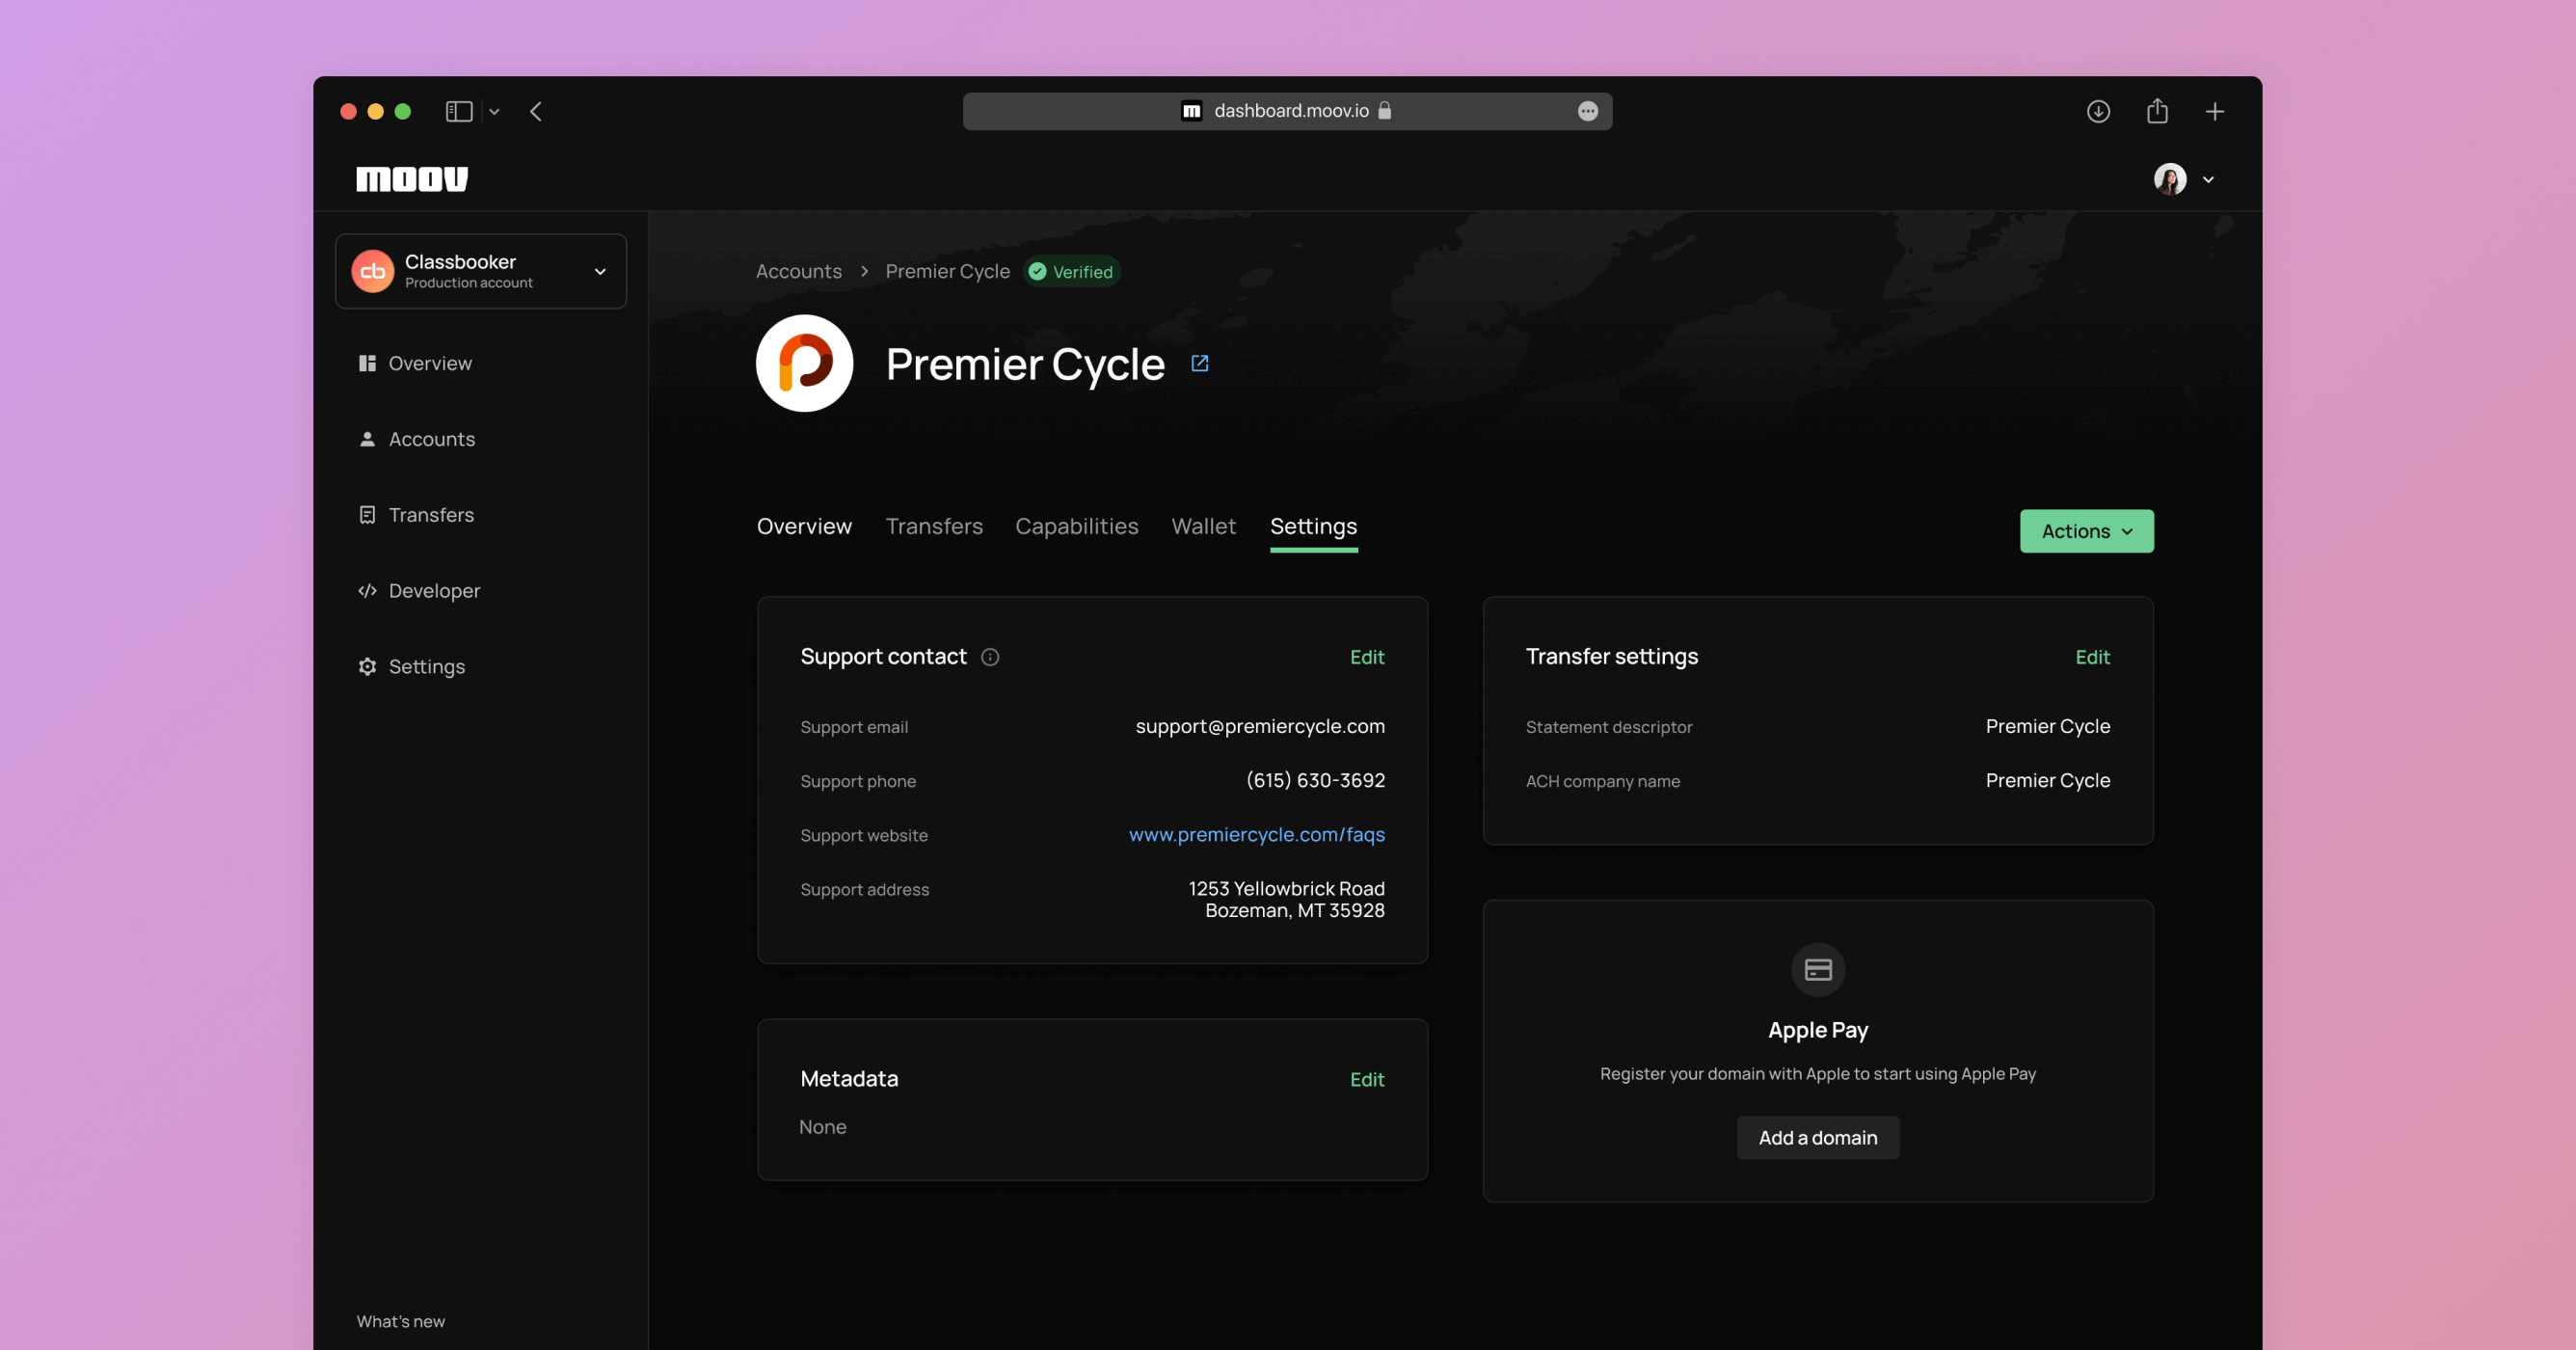
Step 1: Register your domains
Any domains that will be used to accept payments must first be registered and verified with Apple. You can do this through the Moov Dashboard. Domains must be registered for each individual merchant account i.e., the destination of the Moov transfer.
- Within an account, navigate to the settings tab. Select settings and you will find an Apple Pay section where you can add your domains.
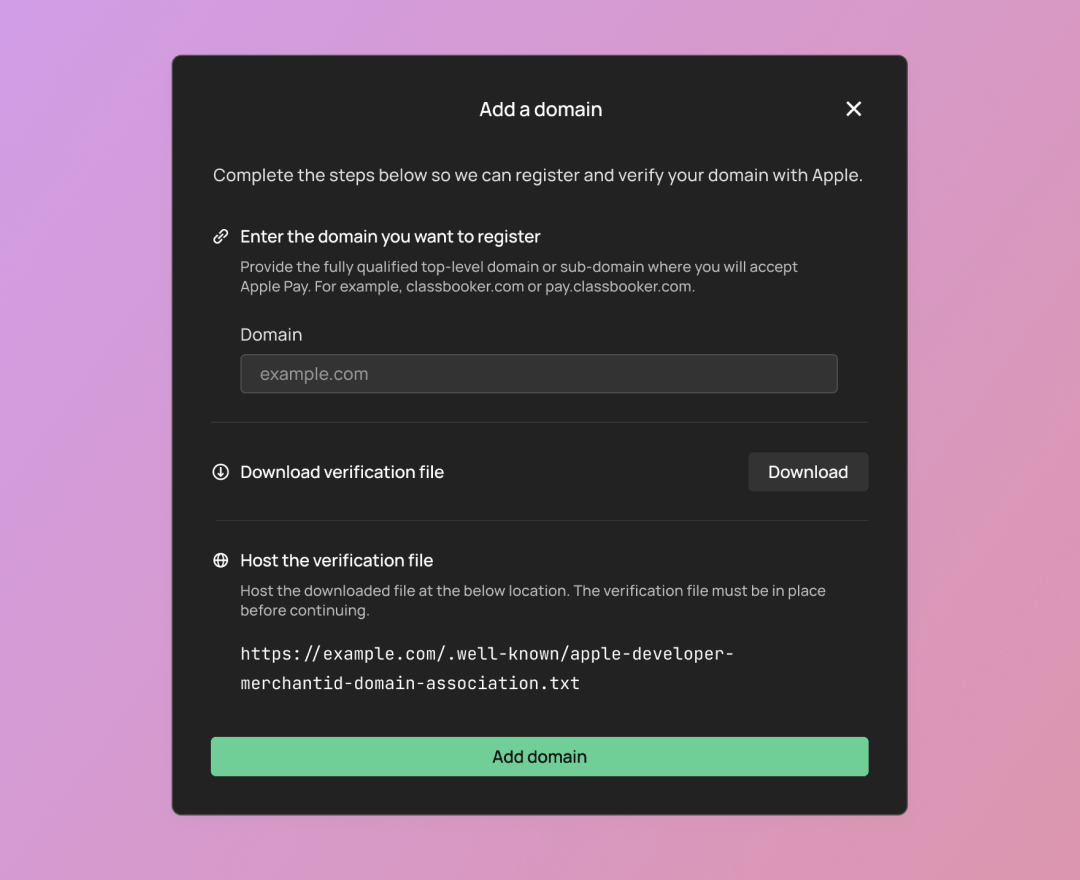
- To register a domain, you will need to verify your domain. Download the file and host it at the following path for each domain you are registering. Ensure the file is in place before clicking Add a domain.
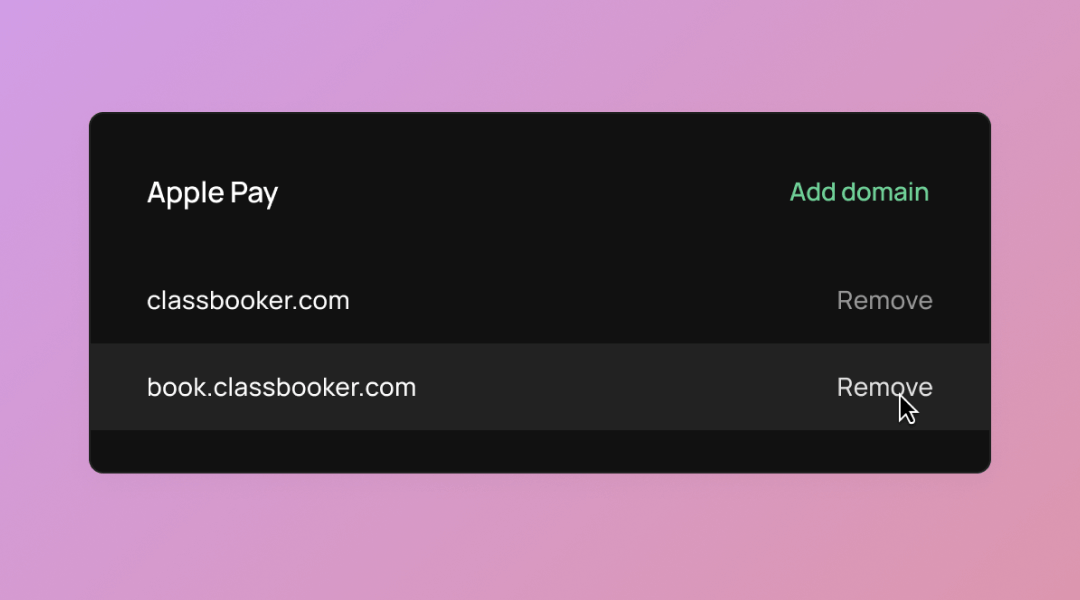
- You will now see a list of the domains you’ve added. You can come back to this page to remove or add domains.
Step 2: Add Apple Pay button
With the browser-native Payment Request API, there are no additional libraries that you need to download since everything is supported within Safari. You can also use the Apple Pay JS API.
Add a button element to your webpage to display the Apple Pay buy button. You can specify the Apple Pay button style, type, and localization using attributes. Use CSS to set other properties, such as the size and corner radius.
See the Apple Pay documentation for more details on customizing buttons using CSS.
Here’s sample code for adding a black Buy with Apple Pay button, using the default size and corner radius:
|
|
You can use the canMakePayment() method to check if the device supports Apple Pay:
|
|
Step 3: Set up the Payment Request API for Apple Pay
After adding the button, you can set up methods, details, and options in the Payment Request API.
Methods
In Methods, indicate Apple Pay as a payment method by using:
- “https://apple.com/apple-pay”
- the Moov Account ID you have certified for Apple Pay
- the capabilities
- networks supported
For more details, read the W3 documentation on Methods.
Details
In Details, you can specify transaction details. For example, the transaction’s amount, shipping options, display items, and other modifiers.
For more details, read the W3 documentation on Details.
Options
In Options, you can include any specific customer details or shipping information.
For more details, read the W3 documentation on Options.
|
|
Step 4: Detect if Apple Pay is available & create a payment request
The Apple Pay button should only be displayed if your user is using a supported device. You can check if the browser will support ApplePaySession with the call below:
|
|
Another option is to use Apple’s JS library canMakePaymentsWithActiveCard method to check if the device supports Apple Pay and the user has an active card in their wallet. In the request below, you should use the merchant’s Moov account ID as the merchantIdentifier.
|
|
Now that you have verified eligibility and added the button, you are ready to create a payment request with the previously-defined options when the button is clicked:
|
|
Step 5: Create and validate an Apple Pay merchant session
Once the payment request has been created, it’s time to create and validate an Apple Pay merchant session using the Moov API endpoint or Moov.js method shown below:
|
|
This request accepts the account ID and display name of the merchant that will be accepting the payment. The response is a promise that includes the opaque merchantSession response from Apple to be used to resolve the onmerchantvalidation step.
accountID- Moov account ID of the merchant i.e., the destination of the transferdisplayName- Merchant name for display in the Apple Pay payment sheet e.g., “Whole Body Fitness”
displayName from the merchant session may be displayed as the merchant name in Apple’s native Wallet app. On the actual card statement, the statementDescriptor or dynamicDescriptor will be displayed with the same logic as other card payments.
Step 6: Link Apple Pay Token
The next step is to link an Apple Pay token to the payer’s Moov account using the Moov API endpoint or Moov.js method shown below. The request accepts the account ID of the payer as well as the opaque paymentResponse from Apple.
|
|
Step 7: Create transfer & dismiss payment sheet
The response payload from linking a token includes a paymentMethodID that is used as the source for the transfer in Moov’s create transfer endpoint. There is no Moov.js method for creating a transfer.
Besides the apple-pay source payment method type, Apple Pay transfers are created the same as other card payments. To learn more about card payments with Moov, read our card acceptance use case guide.
|
|
Use the x-wait-for header on the transfer request to receive a synchronous response from the card network to close out the payment sheet.
|
|
Seeing it altogether
Here’s a sample that synthesizes the steps above all in one place:
|
|
For more information, refer to Apple’s documentation.